Monday, January 3, 2011

Keel Surgery

So while Mike was valiantly forging ahead and making progress, I was having a bit of a setback. My keel was twisted. There was an S curve to the stern stem that started from in front of the stern butt seam. It looked like this:


It's a little hard to see in the picture, but it was not good. Previously, in a moment of frustration combined with really wanting to move on to the next phase, I had deemed the slight twist to be "probably not that big of a deal." At the time (after finishing wiring), the thought of rewiring seemed like a daunting task. So I went ahead with the epoxying of the seams, thinking that I could somehow "fix" the twist with the thick wood flour bead used to round the stems. Of course, that didn't work at all.


As I continued on, I kept thinking about the twisted keel and how annoying it would be if it made the boat track improperly, and WHY didn't I just fix it when I had the chance? Once the hull was ready for fiberglassing (after which there'd be no turning back), I took another look at it. It looked bad. It bothered me. Fixing it would be annoying. Paddling for months in a boat that didn't move properly would be REALLY annoying. It had to be fixed. I stewed about the whole thing for a couple days, then sucked it up and got ready for kayak surgery.


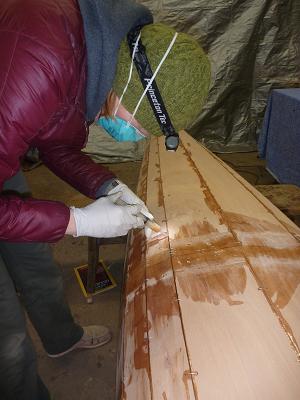
Step one involved filing/scraping off the thick wood flour/epoxy bead that covered the stem. Not so bad. Then the triangular stern brace had to be removed, so that I could cut open the keel and move the panels around. Here, the tip of the hot glue gun is being used to soften up the glue holding the brace in:


Once the brace was out, it was time to open up the keel. SCARY!! Some folks online recommended using a saw to cut the panels apart, but the thinnest saw I had was still too thick, so I used a razor knife to separate them. I kept having visions of the boat suddenly splitting apart and exploding into tiny pieces, but this did not happen. There was a moment when I got to the curve in the stem when a good chunk of the keel cracked open that made my heart stop, but the boat had split where I wanted it too, so all was well. Once I got past the curve, I turned the boat over onto level benches and strapped it down with strapping tape (which I had also wrapped around the hull in several places, just to feel good about keeping everything together).

The tip of the hot melt gun worked wonderfully to heat up the epoxy so that the knife could slice through it like butter. It also worked really well to "dig out" the epoxy from the groove in the keel. I worked my way along the keel inch by inch, till I got to about 6 inches in front of the stern seam.


Once the keel was split open, it became clear that I needed to separate the first panels, too, so I repeated pretty much the same process to release both the #1 panels. The whole process took somewhere around 6 hours. Once the panels were sanded smooth, it was time to rewire them:


Hooray! The loosely wired panels were clamped back together, then the clamps were wiggled around all over the place until everything looked straightened up (which was hard to see with all the wires in the way...), then the stern brace was put back in, the wires tightened up, and the seams re-epoxied.
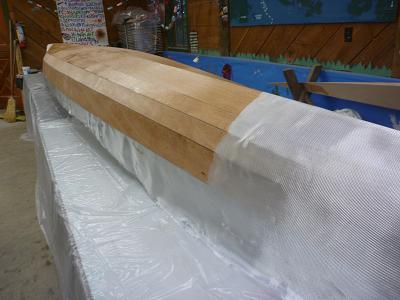
Three days after surgery began, I had a straight keel. At least it's 99% straight. It's a hell of a lot straighter than it was, anyway, and here it is all shiny with a saturation coat!

I feel like a proud mother of the Little Keel that Could. It looks much, much better and I'm quite happy with how it turned out. The wood on the stern is a little marred in some places, but otherwise you can't really tell it had been fixed. I had been really dreading (and whining about) this whole process, especially after all that scraping and sanding, all I wanted to do was get the hull glassed. But I'm SO glad I took the time to fix this, and it turned into a great learning experience and confidence boost.

Saturday, December 25, 2010

Glassing the hull

Once the hull was free of sawdust I mixed up some epoxy, poured it into a paint tray and used the thin rollers that we bought at Pygmy to roll a thin saturation coat over the entire boat.
Then I went over all of it with a foam brush to smooth out any drips or bubbles. And let that dry overnight.
Then I lay the fiberglass cloth over the entire boat cutting it about 1-2 inches from the sheer seam and doing the little cut on the stern that is described in the manual. I was a bit worried about the cloth sliding as I rolled epoxy on it so I placed some weights on the top and used some scotch tape to attach the inside of the cloth to the inside of the boat. I probably didn't need to do this but it worked this way anyways.
Then I rolled epoxy over the cloth doing 4.5 oz. batches at a time. I used a squeegee to get all the excess epoxy off after the cloth was wetted. I have been very careful to not use too much epoxy in any step because I don't want to have to go through the scraping madness I had to previously.
You can see the difference between cloth with epoxy and without. It is completely see through. Once done with that I let it cure overnight.
Then I rolled a fill coat of epoxy (again making sure it is thin and smooth) over the entire boat. I placed a strip of fiberglass tape over the keel seam and used a bristle brush to wet the tape entirely with more epoxy. You can see the tape on the keel.
Then one more fill coat. After doing all this it really made the color of the wood pop out and I can definitely see a few scratches and discolorations under the fiberglass but it looks sweet overall.

Monday, December 20, 2010

Scraping, scraping and more scraping

And then it was time to scrape off all the excess epoxy from doing the seams. Oh man I wish we had been less messy. And thank you whoever invented the cabinet scraper. Shown below is how we scraped the epoxy off. It took me about a week (mostly because I had to work, too, and because I don't have robot arms). Kelly had to work more so had less time to scrape and she should be done soon.

We turned this...


into this...


...and finally to this. The cabinet scraper gets dull pretty easily and to sharpen it we used Todd Clippinger's method. This doesn't get "the finest" finish. But I have come to terms with the fact that my boat won't be the prettiest out there. I just want it to get me from Alaska to Orcas. And for that it doesn't need to look awesome.

After all the scraping, I did a little sanding, and used a moist sponge, a pin, and my lungs to get as much sawdust off as possible.

Epoxying and rounding the stems

The stems (the part of the keel seam that goes from the bow and stern towards the center of the keel until the edges of the panels meet) need to get a large bead of epoxy that is crazy thick with wood flour. Make sure it isn't too thick though, I made my first batch with too much wood flour and it caused only the more liquid elements of the mix to come out making it too thin and leaving a bunch of really thick epoxy stuck in the syringe. It should be thick enough though so that when you put it on the vertical stern seam it won't drip.
We let those large beads thicken and then wrapped some duct tape around the end of our file (so it reduced the scratching on the panel) and filed the bead flush with the panel on either side so it pretty much made a point. We then filed and sanded that bead round.

You can see the difference!

Thursday, December 9, 2010

Epoxying seams and clipping wires

Once all the seams were wired we put the boats on three benches (essentially sawhorses) and used a level, a long 2x4, and old national geographic magazines as shims to get everything level. Our boats didn't seem to twist too much, so we ran our hands along the inside and outside of the seams to make sure that the seams were making a smooth, even transition. We eyed the keel and made adjustments to make sure that there weren't any flat spots (that we could tell) and that it was straight. Then we epoxied the seams.
Epoxying the seams made me the most nervous of all. I mean drilling holes in the wood seemed scary and permanent, but this was worse. Once all the seams are epoxied that's pretty much it unless you really mess up and you have to go back and remove all the epoxy...that would be horrible.

So we mixed up some epoxy and put it in the supplied dental syringe and squirted a bead along all the seams except the very ends of the boat where it is too vertical. It was fairly messy...but we can scrape, file and sand all the excess epoxy drips later. Oh and the power went out hence the headlamps, we were a little worried about the epoxy getting too cold in the jugs and it did start to flow a bit slower but it seems to have turned out fine.


We waited 40 minutes then went back over each seam with a bead of wood flour-thickened epoxy. The seams were left to cure over night. We didn't realize this at the time, but any excess wood flour epoxy has to be taken all the way off (as opposed to clear) because it will show up after we glass the hull. Needless to say we could have probably been less messy and saved work down the line.

The next morning we tipped the hulls up on their sides to do the same process as above with the previously vertical end seams. We found that it was hard in the previous step to fully get the seam nearest the sheer line of the hull epoxied so we added more to that seam too. The epoxy was left to dry for 8 hours, and that evening we did the other side.

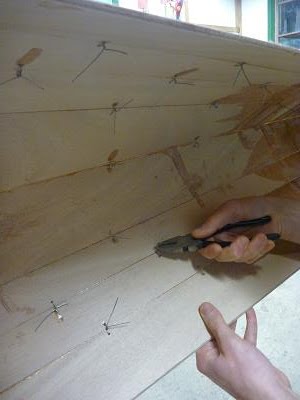
Here was another very nerve-wracking step:taking out the wires. In our heads we were imagining that we some how messed up the epoxy and as soon as we clipped the wires all of the panels would spring open again and we would have to start all over...this didn't happen. This was actually much easier than I thought it would be. I thought since the wires had a lot of epoxy on them seemingly attaching them to the wood that it would be very difficult. Since we clipped the wires while the epoxy was still a little "green" they came out relatively easily. I found the easiest way was to clip the center of the all the wires on the outside of the hull and peel the ends of the wires up on both sides then clip them flush with the boat. Then turn the hull over and pull the twisted end out with pliers. It was difficult to not mar the wood a little bit...we did the best we could.

And now we have all the wires out and are refilling the seams that didn't get enough epoxy in the first few steps with more wood flour-thickened epoxy.

Tuesday, December 7, 2010

Wiring the Hull

Now that the panels were drilled, it was time to wire them together! This step was both hugely satisfying and incredibly tedious, as we spent a good 9 hours twisting together tiny wires.

First we propped the boats up on boxes/crates/buckets while we wired the keel together. Pygmy recommended bending the wires over a scrap of wood to make a "staple," but we found that this made it harder to fit the wires through the holes. It seemed easier to just leave a curve in the wire, then pull it tight with pliers. After the keel was wired together we attached the bow, center, and stern frames to the keel seam. The frames generally flopped around and got in the way for the rest of the wiring process.


Once the keel was wired, it was time to attach the next panels. Before they could be wired, holes had to be drilled to the bottom of next panel, directly across from the holes that were pre-drilled (the day before) in the outside of the keel panel. We had initially thought that this would be tricky and involve lots of clamping and measuring, but quickly realized that we could just eyeball where the hole should go and (carefully) hold the panel while drilling. Drilling soon became a much less scary process.


After the corresponding holes were drilled, the chines were wired together, (twisted by hand first, then tightened with pliers once all the wires were in). This process was repeated for the rest of the hull panels. The keel and bow stems got extra wires added to help keep everything in place.

Once all panels were added and the chines wired together, it was time to (finally) wire the frames to the panels. This shaped-up the hull and made everything feel really solid. Our boats now looked like boats!! We also wired in the stern and bow wedges. Interestingly, the bow of Mike's boat was really narrow, and the wedge had to really be *wedged* in. My bow was much wider and I had to do a lot of wire tightening to get the panels up to where they needed to be.

We then hot-glued the frames into place, and got ready to flip the boats over and epoxy the seams.

Thursday, December 2, 2010

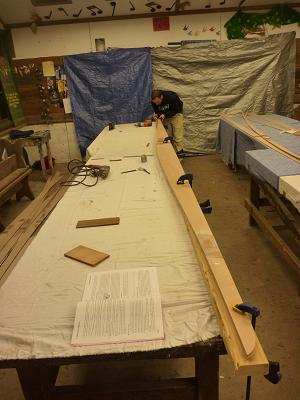
Drilling!

We had to drill holes the whole way down the edges of some of the panels every 6 inches. This made me kind of nervous...drilling holes in our new kayak panels? But I think it worked out. I ended up not using a jig as it mentions in the manual. I just measured every six inches and drew a dot 1/4 " away from the edge of the panel, then clamped them to the table and drilled away, we'll see if I was precise enough when we wire the hull together today. Since Kelly and I are building boats at the same time I just stacked all four like panels together and made sure they lined up well and then drilled all four at once. Saved a little bit of time.