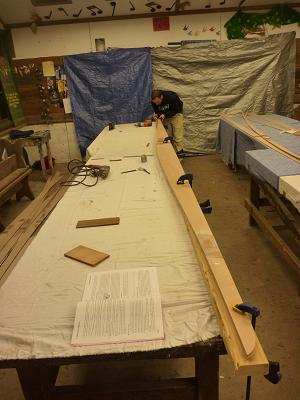
Once all the seams were wired we put the boats on three benches (essentially sawhorses) and used a level, a long 2x4, and old national geographic magazines as shims to get everything level. Our boats didn't seem to twist too much, so we ran our hands along the inside and outside of the seams to make sure that the seams were making a smooth, even transition. We eyed the keel and made adjustments to make sure that there weren't any flat spots (that we could tell) and that it was straight. Then we epoxied the seams.

Epoxying the seams made me the most nervous of all. I mean drilling holes in the wood seemed scary and permanent, but this was worse. Once all the seams are epoxied that's pretty much it unless you really mess up and you have to go back and remove all the epoxy...that would be horrible.

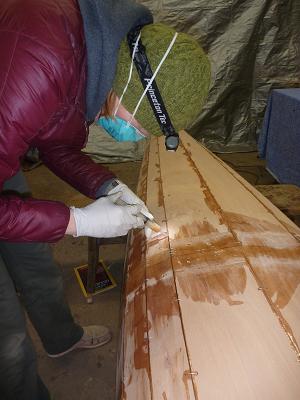
So we mixed up some epoxy and put it in the supplied dental syringe and squirted a bead along all the seams except the very ends of the boat where it is too vertical. It was fairly messy...but we can scrape, file and sand all the excess epoxy drips later. Oh and the power went out hence the headlamps, we were a little worried about the epoxy getting too cold in the jugs and it did start to flow a bit slower but it seems to have turned out fine.

We waited 40 minutes then went back over each seam with a bead of wood flour-thickened epoxy. The seams were left to cure over night. We didn't realize this at the time, but any excess wood flour epoxy has to be taken all the way off (as opposed to clear) because it will show up after we glass the hull. Needless to say we could have probably been less messy and saved work down the line.

The next morning we tipped the hulls up on their sides to do the same process as above with the previously vertical end seams. We found that it was hard in the previous step to fully get the seam nearest the sheer line of the hull epoxied so we added more to that seam too. The epoxy was left to dry for 8 hours, and that evening we did the other side.

Here was another very nerve-wracking step:taking out the wires. In our heads we were imagining that we some how messed up the epoxy and as soon as we clipped the wires all of the panels would spring open again and we would have to start all over...this didn't happen. This was actually much easier than I thought it would be. I thought since the wires had a lot of epoxy on them seemingly attaching them to the wood that it would be very difficult. Since we clipped the wires while the epoxy was still a little "green" they came out relatively easily. I found the easiest way was to clip the center of the all the wires on the outside of the hull and peel the ends of the wires up on both sides then clip them flush with the boat. Then turn the hull over and pull the twisted end out with pliers. It was difficult to not mar the wood a little bit...we did the best we could.

And now we have all the wires out and are refilling the seams that didn't get enough epoxy in the first few steps with more wood flour-thickened epoxy.
 Once the hull was free of sawdust I mixed up some epoxy, poured it into a paint tray and used the thin rollers that we bought at Pygmy to roll a thin saturation coat over the entire boat.
 Then I went over all of it with a foam brush to smooth out any drips or bubbles. And let that dry overnight.
 Then I lay the fiberglass cloth over the entire boat cutting it about 1-2 inches from the sheer seam and doing the little cut on the stern that is described in the manual. I was a bit worried about the cloth sliding as I rolled epoxy on it so I placed some weights on the top and used some scotch tape to attach the inside of the cloth to the inside of the boat. I probably didn't need to do this but it worked this way anyways.
 Then I rolled epoxy over the cloth doing 4.5 oz. batches at a time. I used a squeegee to get all the excess epoxy off after the cloth was wetted. I have been very careful to not use too much epoxy in any step because I don't want to have to go through the scraping madness I had to previously.
 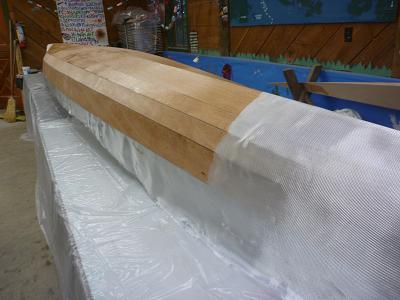 You can see the difference between cloth with epoxy and without. It is completely see through. Once done with that I let it cure overnight.
 Then I rolled a fill coat of epoxy (again making sure it is thin and smooth) over the entire boat. I placed a strip of fiberglass tape over the keel seam and used a bristle brush to wet the tape entirely with more epoxy. You can see the tape on the keel.
 Then one more fill coat. After doing all this it really made the color of the wood pop out and I can definitely see a few scratches and discolorations under the fiberglass but it looks sweet overall.