 Epoxying the seams made me the most nervous of all. I mean drilling holes in the wood seemed scary and permanent, but this was worse. Once all the seams are epoxied that's pretty much it unless you really mess up and you have to go back and remove all the epoxy...that would be horrible.
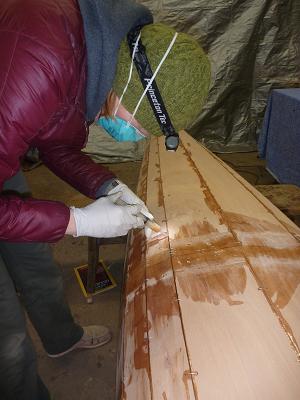
So we mixed up some epoxy and put it in the supplied dental syringe and squirted a bead along all the seams except the very ends of the boat where it is too vertical. It was fairly messy...but we can scrape, file and sand all the excess epoxy drips later. Oh and the power went out hence the headlamps, we were a little worried about the epoxy getting too cold in the jugs and it did start to flow a bit slower but it seems to have turned out fine.

We waited 40 minutes then went back over each seam with a bead of wood flour-thickened epoxy. The seams were left to cure over night. We didn't realize this at the time, but any excess wood flour epoxy has to be taken all the way off (as opposed to clear) because it will show up after we glass the hull. Needless to say we could have probably been less messy and saved work down the line.
 The next morning we tipped the hulls up on their sides to do the same process as above with the previously vertical end seams. We found that it was hard in the previous step to fully get the seam nearest the sheer line of the hull epoxied so we added more to that seam too. The epoxy was left to dry for 8 hours, and that evening we did the other side.
 Here was another very nerve-wracking step:taking out the wires. In our heads we were imagining that we some how messed up the epoxy and as soon as we clipped the wires all of the panels would spring open again and we would have to start all over...this didn't happen. This was actually much easier than I thought it would be. I thought since the wires had a lot of epoxy on them seemingly attaching them to the wood that it would be very difficult. Since we clipped the wires while the epoxy was still a little "green" they came out relatively easily. I found the easiest way was to clip the center of the all the wires on the outside of the hull and peel the ends of the wires up on both sides then clip them flush with the boat. Then turn the hull over and pull the twisted end out with pliers. It was difficult to not mar the wood a little bit...we did the best we could.
And now we have all the wires out and are refilling the seams that didn't get enough epoxy in the first few steps with more wood flour-thickened epoxy.
WOW. Your descriptions are wonderful, I read while holding my breath and feel some of the tension you guys must be feeling then by the end I can breathe again and you both have successfully navigated another step in your adventure! Love to you both
ReplyDelete